
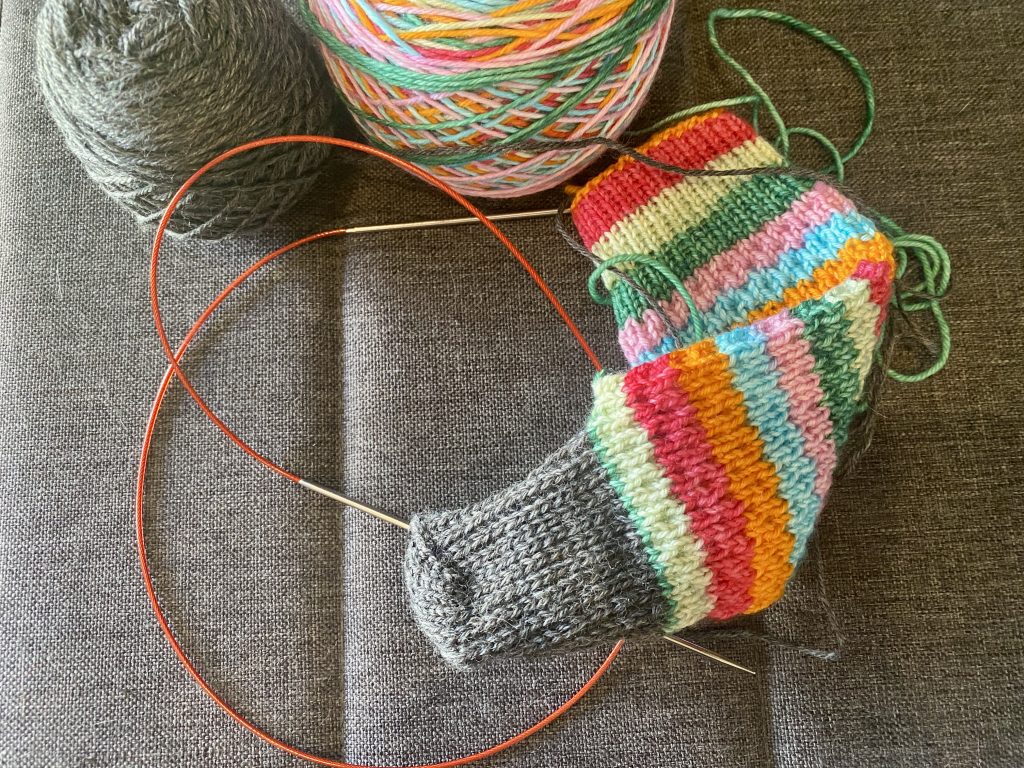
It’s time for my favorite part of knitting a sock! The leg is at the perfect length and it’s time to work the heel.
I’ve tried many different heels for socks and this is my go-to favorite. It fits really well, it holds up with wear, and it’s really fun to make.
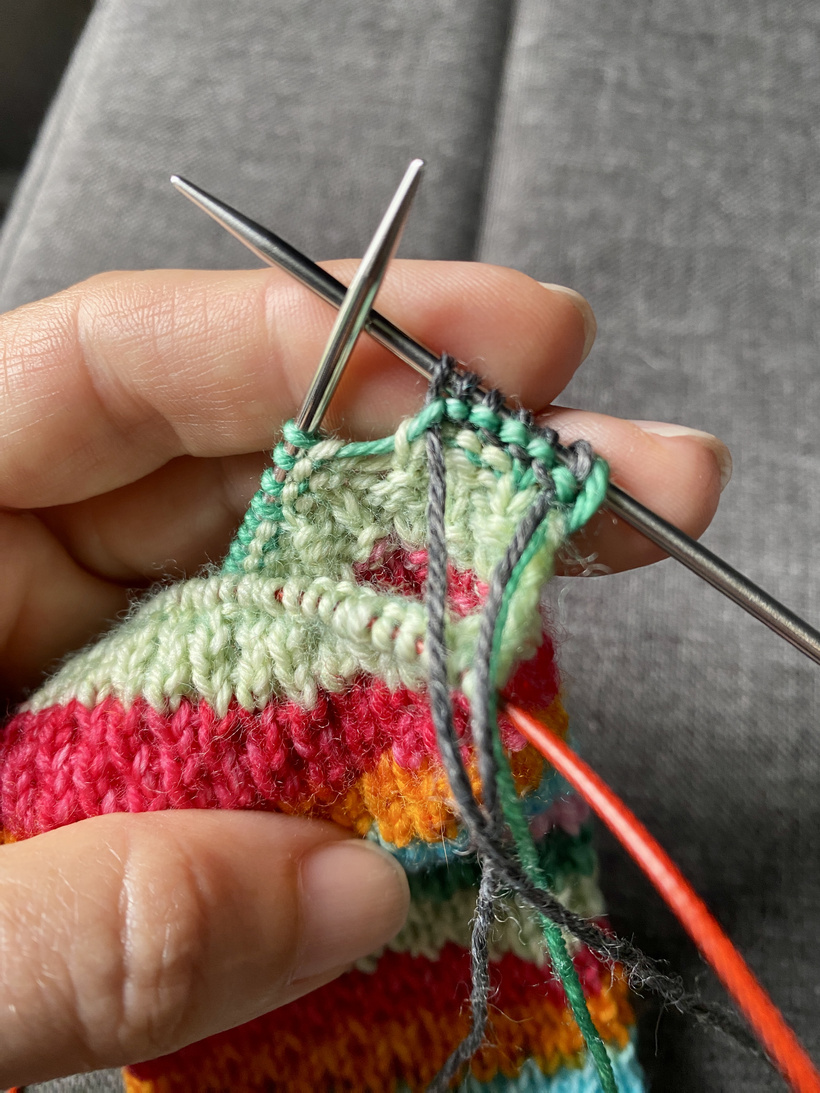
The heel is worked flat, across only the back half of the stitches, the front half rest for now.
Contrast Heel – If you’re adding a contrast color for your heel (like I am), add the new color with the 1st purl stitch. Don’t break the main color, it can rest until we join later.
- Start with the Wrong Side (inside of the sock) facing you.
- (WS) sl 1, p27 (31, 35) ~ turn
- (RS) sl 1 knit-wise, {k1, sl 1} rep to last stitch, k1 ~ turn
- Repeat rows 1 & 2 a total of 14 (16, 18) times

How to count the Rows of the Heel Flap
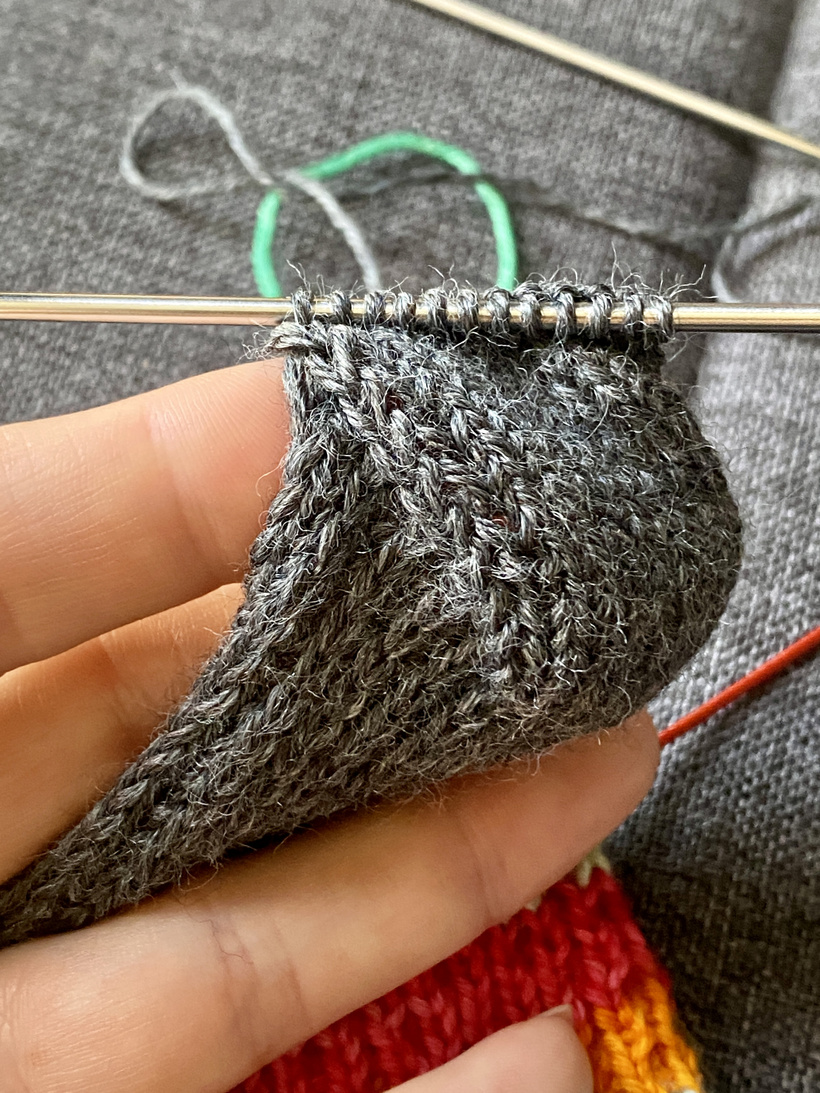
I don’t use a row counter for my heel. Each slipped stitch row (row 2) leaves a pattern that is easy enough to count, if you know where to look.
This is after working 1 repeat. The slipped stitches create little bumps that you can count as you go.
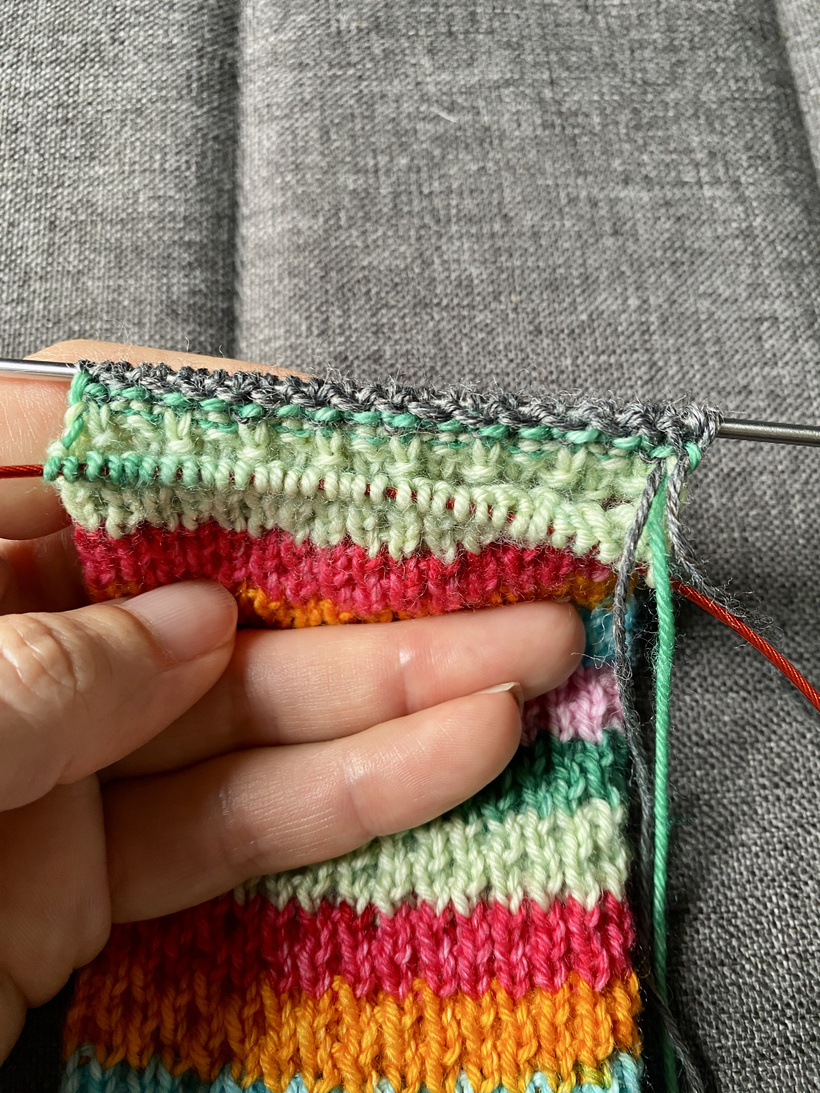
Each of those slipped stitch bumps counts as 1 repeat. I’m making the Medium size, so I needed 16 repeats. The first row is where I added my contrast color, and the last row of ‘bumps’ is on the needle.
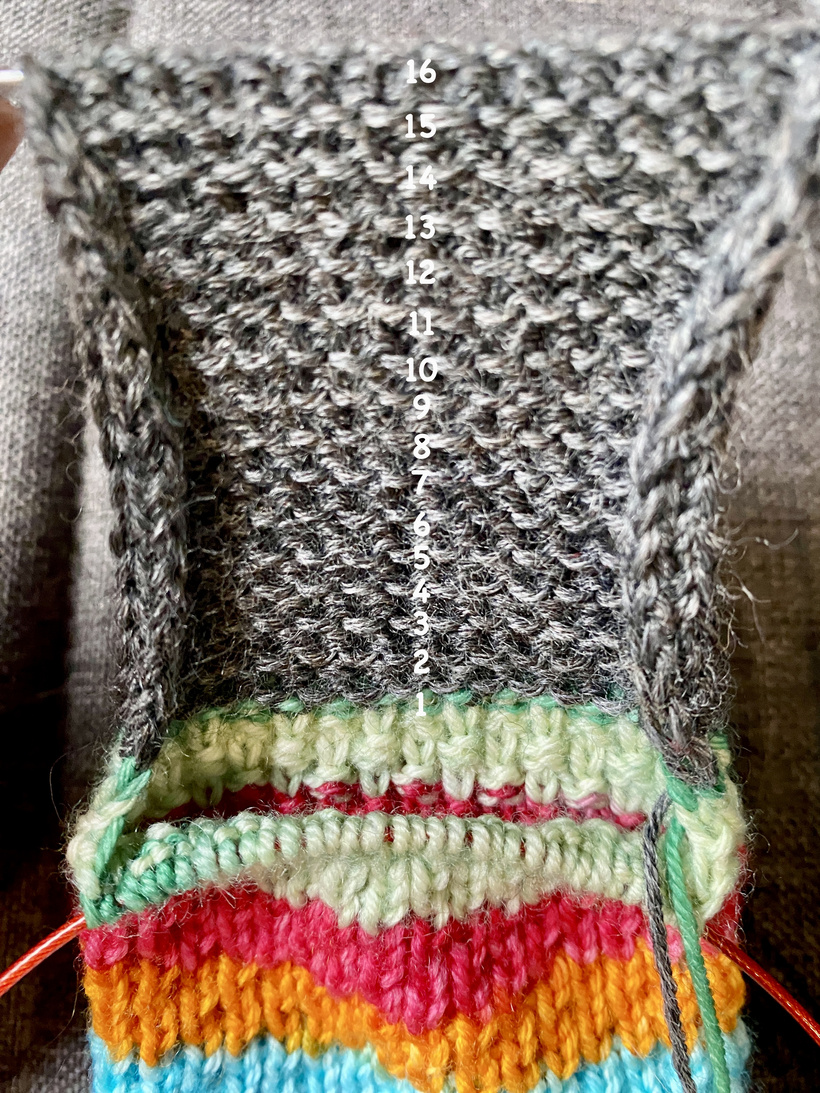
You can also count from the Right Side, I just find it easier to count the bump ridges.
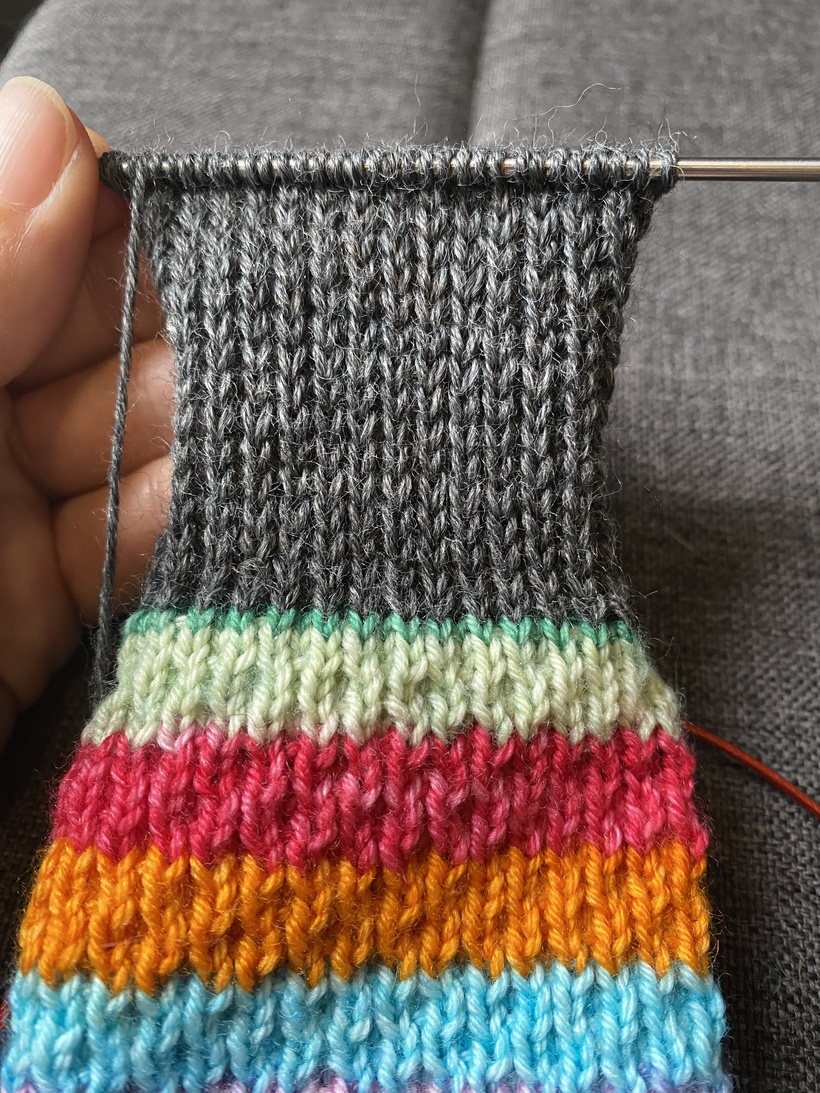
You can’t see it quite yet, but each of the straight ridges of the leg pattern line up with the ridges of the heel flap. Once they’re done and on feet, it stretches out and looks so nice.
Turning the Heel
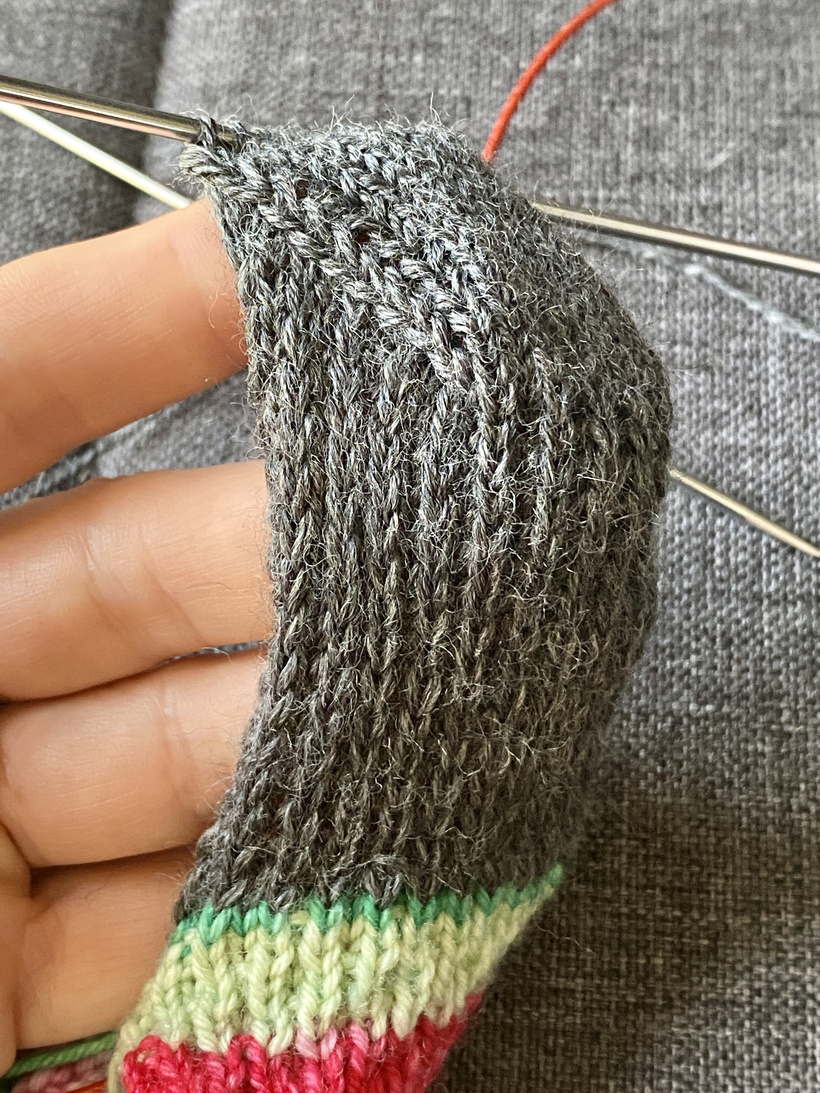
The Heel Turn hardly takes any time at all, but it’s an important detail to create a cup for the heel and reduce the number of “heel stitches.” I forgot this step before and started picking up for my heel gusset. It became a very weird shaped sock that had to be picked back. So, best not to leave out this detail 🙂
- (WS) sl 1, p17 (20, 23) p2tog ~ turn
- (RS) sl 1, k8 (10, 12) ssk ~ turn
- (WS) sl 1, p8 (10, 12) p2tog ~ turn
- Repeat rows 2 & 3, (ending with a row 2) until there are 10 (12, 14) sts remaining. These are the Heel Stitches.
Look for the Gap
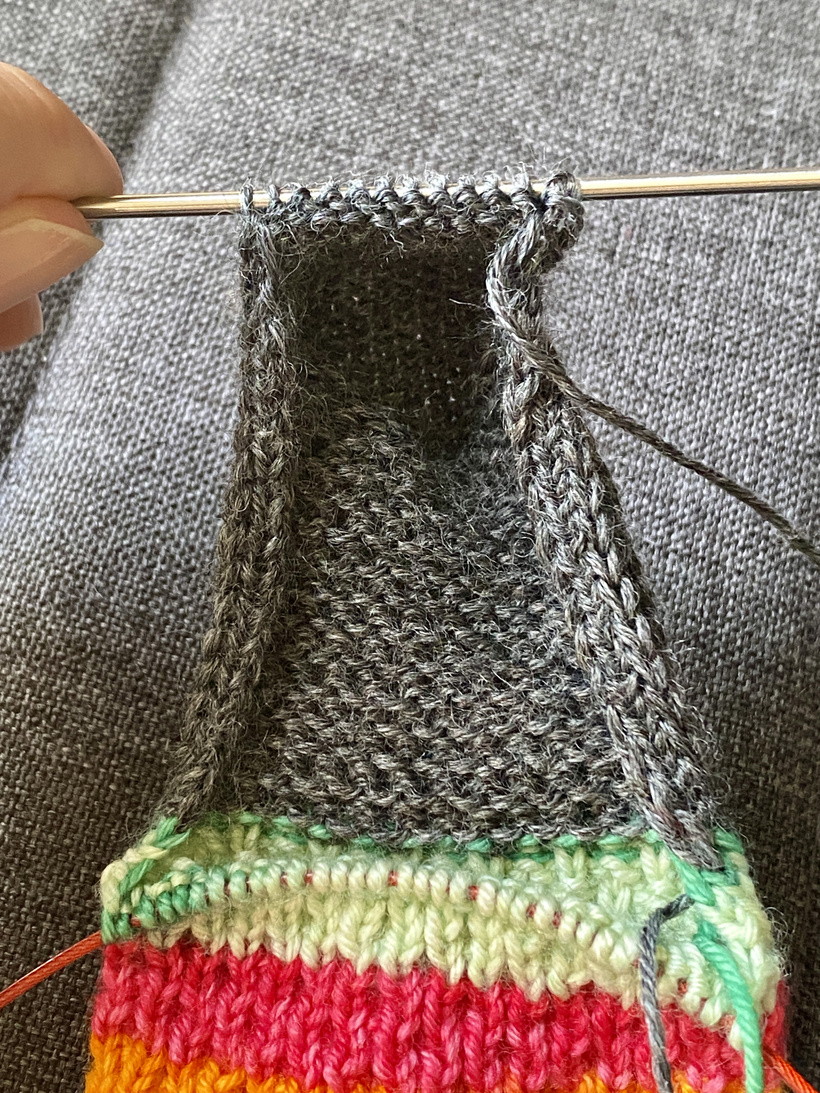
After you get the first set-up rows done for the turn, it’s easy to see where to decrease with the p2tog or ssk. Every time you turn, it leaves a noticeable gap, and the decrease is worked to pinch the stitches either side of the gap together.
Here’s the gap from the purl side – see how a p2tog would snug the next 2 stitches together…
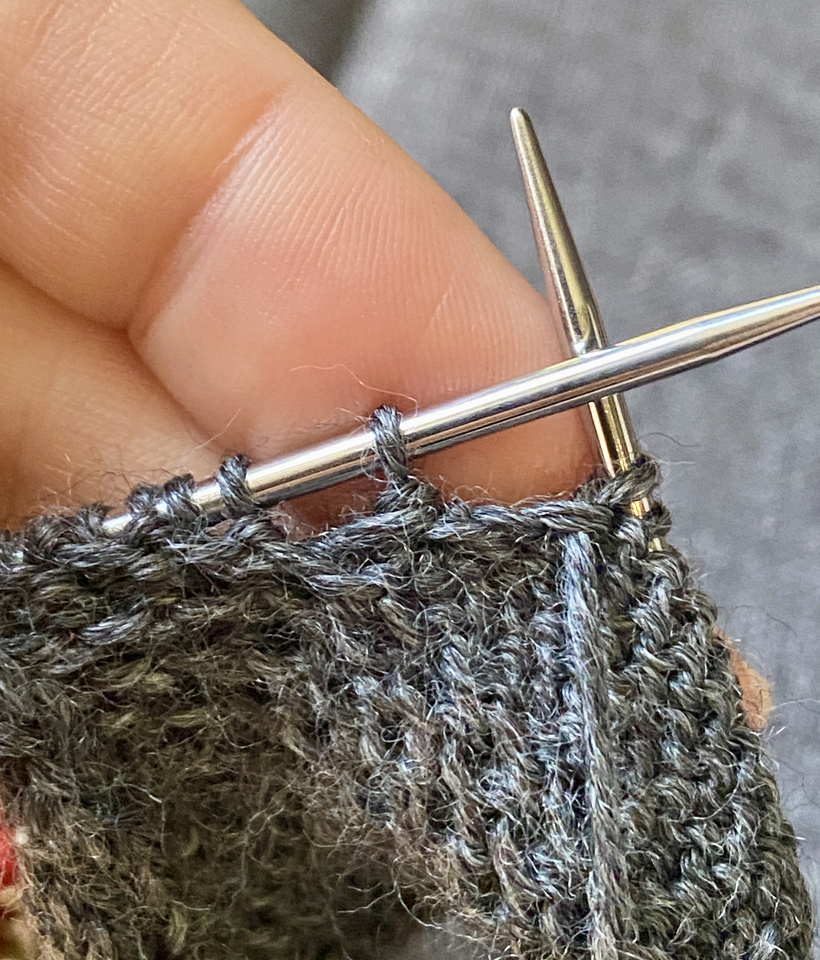
And here’s the gap from the knit side – a ssk will snug the next 2 together to close the gap…
The heel turn is basically just closing these gaps with a decrease until there aren’t any stitches left when the work is turned.
I love working all 3 parts of the heel: Flap, Turn, and Gusset because after the Turn you can really see a sock forming. Even though I’ve made loads of socks, it still feels like magic working through the heel.
The next step (Thursday) is the Gusset Pick-Up and Decreases. It’s fantastic fun, I can’t wait to start on mine because I’ll be joining back up with my main yarn.
Until then, Happy Knitting ~Lisa
Leave a Reply